Setup Personal Cloud Storage Using ownCloud
OwnCloud is a PHP based web application which allows you to store and share your files online, as well as providing functionality to sync your contacts and calendars. It attempts to provide a free, open source and self-hosted implementation of other popular cloud services like iCloud.
However, unlike iCloud, it doesn’t yet have the tight cross-platform integration iCloud offers Apple users. For further details, check out the ownCloud features list. If you’ve got a VPS setup for web hosting and want to use your online storage space, ownCloud is a great self-hosted method of sharing files between multiple computers and devices. In this article, I will walk you through how to install ownCloud on your Linux (cPanel) VPS.
Install required modules in cPanel
I’m assuming in this article that you’re running a cPanel server with CentOS (or a Redhat based operating system). If you are running Debian or one of it’s derivatives you can follow ownCloud’s Debian installation instructions. First you will need to update your LAMP stack to ensure all the necessary modules are installed to run ownCloud on your VPS. To do this on a cPanel server, simply login into WHM and navigate to the ‘EasyApache (Apache Update)’ screen.
- Select ‘PHP Encryption and Image Manipulation’ and click ‘Start customizing based on profile’
- Select ‘Apache 2.2.22’ and click ‘Next Step’
- Select PHP version ‘5.3.16’ and click ‘Next Step’
- Click ‘Exhaustive Options List’
On the exhaustive options list page, select the following PHP modules which are required to run ownCloud:
- PDO MySQL
- Mbstring
- Zip
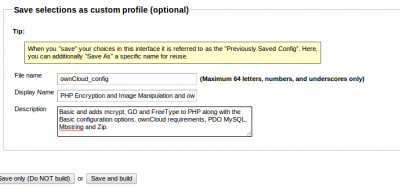
In case you need to make further changes, it is a good idea to save the current profile by adding a file name and description at the bottom of the page. I have called the profile ‘ownCloud_config’ and extended the description as per the below screenshot.

- Click ‘Save and build’ then ‘Yes’ and ‘I Understand’ to the confirmation prompts.
The rebuild of Apache and PHP will take a little while so now is a good time to go and grab a coffee!
- After the rebuild is complete, you will be prompted with a screen titled ‘Configure PHP and SuExec’. Unless you have specific requirements, you can leave all these options as they are and click ‘Save New Configuration’ and then ‘Close’
Install ownCloud
Now your cPanel server has all the required modules installed so we can continue with the installation and configuration of ownCloud. To install ownCloud on the server, we need to upload the source to your cPanel account; this can be done via FTP or cPanel’s own File Manager. I will use the latter method as I presume if you are using FTP you can skip this step and upload as per usual.
- Download the latest stable release of ownCloud here: http://owncloud.org/support/install/
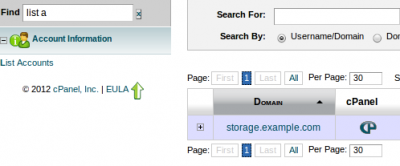
- Login to the cPanel account/domain that you wish to host ownCloud. If you are already logged into WHM, you can click ‘List Accounts’ in the left hand menu and then select the appropriate cPanel icon.

- Once logged into your cPanel account, select the ‘File Manager’ icon and click ‘Go’ on the ‘Directory Selection’ prompt
- Click ‘Upload’ from the top menu and then ‘Choose File’ on the upload screen.
- Select your downloaded version of ownCloud and upload.
- After the upload is complete, click ‘Back to /home….’ where you should now be able to see your uploaded file in the File Manager view
- Click the ownCloud file to highlight it and then click ‘Extract’ from the top menu.
- Choose the folder you want to extract it to (leave it at the default for the main domain) and click ‘Extract File(s)’
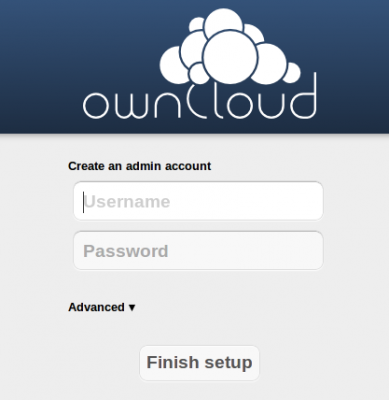
- You will now be able to access the ownCloud setup prompt at the following URL: http://yourdomain.com/owncloud

- To finish the install, simply enter an admin username and password and click Finish.
Once logged in, the interface is fairly intuitive, you can browse and upload files into your ownCloud based on the different categories available. Initially, you may be limited to a maximum upload file size of 2MB due to PHP restrictions. In order to fix this, you will need to edit or create a file named ‘php.ini’ in your ‘public_html’ folder and add the following line to it:
upload_max_filesize = 20M
You can set the maximum upload file size to whatever value you wish, but keep in mind that transferring large files will put extra load on your server.
Now your ownCloud install is configured so you can begin uploading, downloading and sharing files on your Linux VPS!
| Hosting Options & Info | VPS | Web Solutions & Services |
|---|---|---|
-
sweta ranpal
